In this article I’ll be using the provider I use which is SSDNodes to show how to setup a VPS with this provider.
I have been using SSDNodes for 5 years now and host a number of apps, including this website. Here are the details of how I setup mine and how you could set up yours.
Head to SSDNodes web site and have a look at whe types of servers they have to offer. Under “Pricing” you’ll see the costs and services provided. I’m currently using their “KVM/Small” offering on the Triennially plan to get the best price. With this I get 8GB RAM, 160GB SSD and 2 VCPU’s with 4TB/Month traffic. I also added an IPv4 address. For me, this is sufficient for my requirements, but I may upgrade in the not to distant future to the “KVM/Medium”.
Initial Setup
So, you’ve purchased a plan…. Now what ?
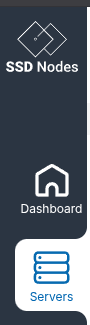
When you have logged in to your account, you’ll want to select the “Servers” option.
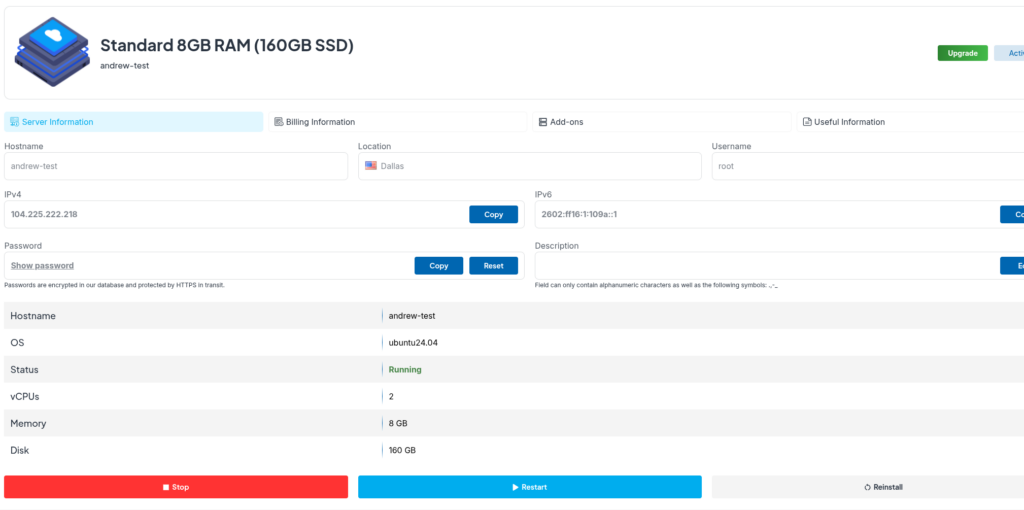
From here you can manage your server. The 1st thing you’ll want to do is to install an OS onto it unless the default server suits your requirement. Select the server from the list. Make sure the server is stopped and click on “Reinstall”
In this instance, it has defaulted to Ubuntu

Installing the OS you Prefer
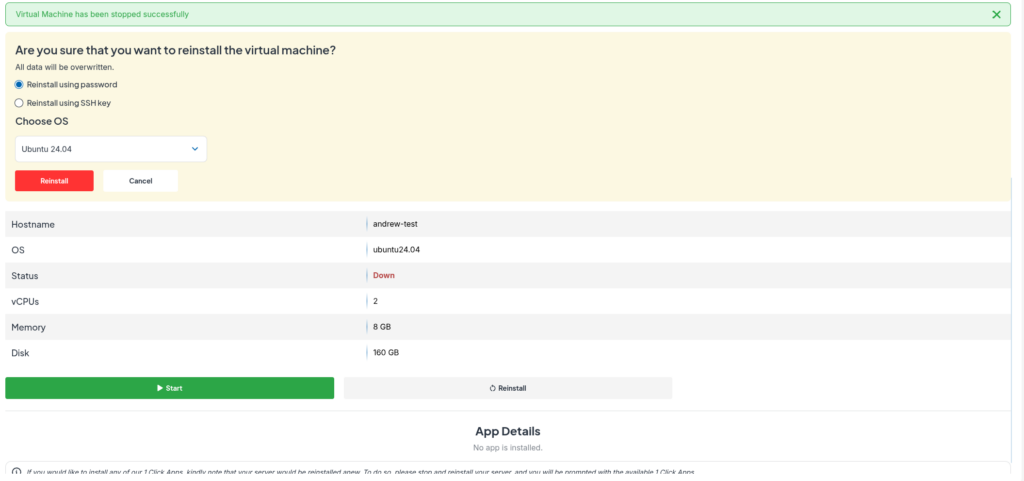
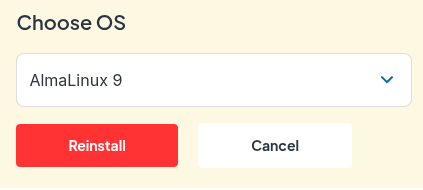
My preference is AlmaLinux mainly because I have been using it for years. To reinstall a new instance (deleting the previous and any data on it) you select the server and select “Stop” as below. It may take a bit for the server to shutdown so just be patient.
Once the server has stopped, you can select the “Reinstall” option and you’ll be presented with this screen
Select your OS
Select your OS from the dropdown
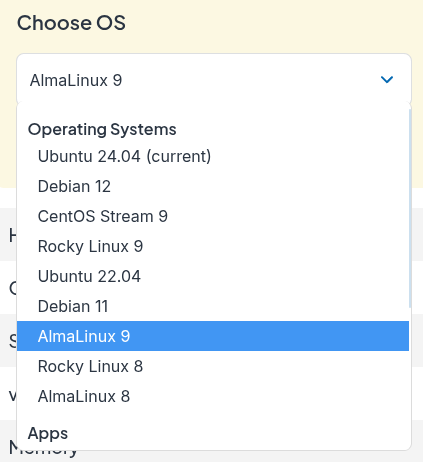
and select the “Reinstall” option below the dropdown.
You will be shown the install will start soon. Just sit back and wait for the install to complete.
When the install is complete, the status will change from

to

Setup Complete
You server is now up and running, but to connect to it, you’ll need to complete a few simple steps.
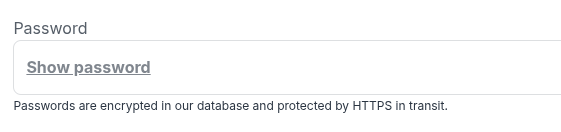
Click on “Show Password” so you can see the SSH root password.
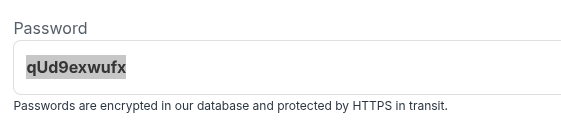
Copy the password. You’ll also need the IP address of the server too. In this case, the IP is 104.225.222.218
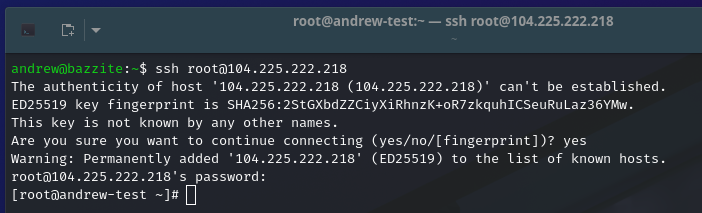
You can now use an SSH client (on linux you can just ssh to it, on windows you could either ssh or use Putty).
You should be able to login to your host and see a screen similar to this
Securing your Server
The next step should be to change the password (we’ll setup a key file shortly for much better security).
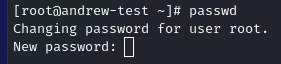
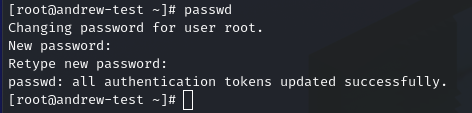
Use the passwd command to set a new root password.
if all goes well, you should see something like this
Updating the OS
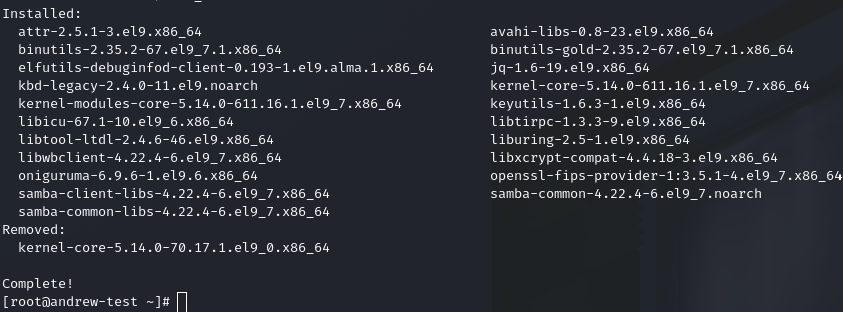
Next you should enter
yum update -yto update the OS. This could take a few minutes. Just let it complete. It can take a while, especially at the end when it completes, but it will come back with the shell prompt. The “-y” tells yum to answer yes to all questions. Feel free to not include that option if you’d like to see what questions are asked.
For this install, there were a lot of updates and it took quite a few minutes at the end waiting for the install to complete, but I eventually got this screen
Improving the Security
Next, we’ll get the ssh connection off port 22 and onto something non-standard so we can reduce the number of attackers. To do this you could use “vi” if you feel comfortable with that, but I’ll use nano here as that will be a lot easier for anyone just starting.
1st we need to install nano using the following
yum install -y nanoThis will install nano. We now need to edit the ssh config screen. Enter the following command at the shell prompt
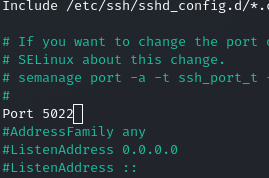
nano /etc/ssh/sshd_configYou’re now in nano. You should see about 22 lines down, the “#Port 22” as shown below
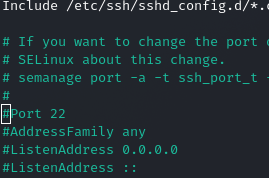
Use the arrow keys to move the cursor to be under the “#” and press the DEL key. The “#” should get deleted. Now move to the end of the line and delete the “22” and replace it with a number like “5022” the number is not really important, but keep it above 1024 as numbers below that are mostly reserved. Whatever number you change it to, make sure you note it down as you’ll need it when you ssh back into the server.
At this stage, the file should look like this
Now we want to save the file. To do this, type Ctrl-X then “y” then press “ENTER” and the file should be saved.
To stay safe, don’t logout of the console yet. We need to restart the ssh daemon with the following
systemctl restart sshdIt will appear to do nothing as shown here, but it will have restarted the ssh daemon

Opening a Port with the Firewall
we have 1 more command to execute to open port 5022 (or whichever port you chose) with the following command
firewall-cmd --add-port=5022/tcp --permanent
firewall-cmd reload
you should see something like this

At this stage, you should now be able to log in using the following ssh command (substituting your IP and port number where applicable). Do this in another terminal window not in your current one. You want to stay logged in to the current window in case you can’t get in. So in another window, you should be able to do the following

If you’re able to log in, the changes were applied successfully, and you can safely disconnect and reconnect. If you’re unable to log in, review the steps to identify where something went wrong and try again. In the worst case, you may need to reinstall the operating system and repeat the process from the beginning.
Congratulations, you now have your server ready for work
You should now have the beginnings of your setup for a VPS. All you need to do is add services. We’ll cover that in another article.
In the next article I’ll show how to generate key files so you can log in securely without a password.
If you find this article of interest then please leave a comment below. If you decide to proceed to purchase a VPS from SSDNodes, then please use my Affiliate link.